
Depending on where you live, an aquarium chiller could be a crucial piece of kit for maintaining a healthy aquarium.
In the same way that most people use a heater to warm their tank, some people need a chiller to keep the water cool.
These can be expensive though, to the point that some people just can’t afford them. One way to reduce the price is to make your own.
This isn’t as difficult as you might think. We will spend this article explaining how you can make your very own aquarium chiller. We’ll tell you all the things you’ll need and walk you through them step by step.
What is an Aquarium Chiller?

Every aquarist will be familiar with aquarium heaters, especially if they are keeping tropical or marine fish, but aquarium chillers are not as well known.
They are a device that removes water from a fish tank, cools it down, then returns it again. This will keep the overall temperature of the aquarium lower.
This is useful because some people live in areas that are particularly hot. The ambient room temperature could be high enough to slowly raise the water temperature, which might be fatal for fish.
In some cases, this is a year-round problem, but in others, it’s seasonal, where there are hot summers and colder winters.
Aquarium chillers fix this problem, maintaining the right temperature during warm periods.
A modern chiller can be very advanced, with the ability to influence large amounts of water and able to sense changes in temperature without any input from you.
The issue is that these can be very expensive, potentially costing many hundreds of dollars. Lots of people can’t afford this; the high price may prevent someone from starting a new aquarium.
A cheaper solution is to make your own aquarium chiller. This might sound difficult, but the process is actually quite simple.
You don’t need to be amazing at DIY to successfully make one if you’ve thoroughly read what you need to do and feel confident that you understand.
The method in this article sends water through a mini-refrigerator to cool it and then returns it to the aquarium.
What You Will Need
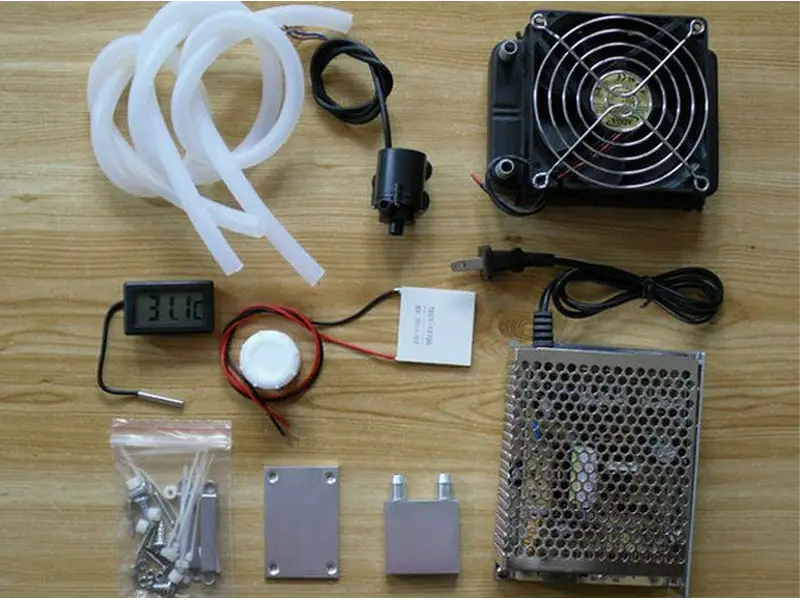
To complete the method below, you will need:
- A mini-refrigerator
- Piping (as much as can fit in the refrigerator)
- A Spade drill (with a spade just smaller than the diameter of the pipes)
- Silicone or expanding foam
With these four things, you can complete the aquarium chiller. You may need extra materials to connect your aquarium, but this will vary between setups. We’ll discuss this later.
Depending on the materials you buy, the chiller can be made for under $100.
Choosing Your Refrigerator.
Mini Refrigerators can be quite compact, making them easier to move and store. If you don’t have much space, you might be forced to use a smaller model.
The larger the refrigerator, the cooler your aquarium water will get because it will spend longer in the system.
Price is another factor that might influence your choice. The refrigerator is the most expensive component you’ll have to buy, but you don’t need to break the bank.
Look around online for a basic secondhand device. It doesn’t need to be brand new and full of fancy gizmos, it just needs to be functioning properly.
The only beneficial feature is a freezer. A small freezer compartment is quite common in mini-refrigerators, having one of these in your DIY chiller will help to circulate cold air.
Choosing Your Piping
A Garden hose is a good choice for the internal piping. It is cheap, sturdy, and well insulated. These qualities mean that you can buy lots of it; it will last a long time, and it will be more effective.
Other options are available, but price should be your main consideration, as you will need lots of piping to fill your refrigerator.
Just how much will depend on the refrigerator’s size; make sure you know how much will fit inside before purchasing.
Hopefully, you can fit at least 100 ft. of piping. The more piping you use, the greater the effect of the cooler.
Choosing opaque piping will help to control algae, which needs access to light for growth. A buildup of algae in your pipes could lower the quality of your water and restrict its flow.
Method
There are a few ways to make an aquarium chiller. Some are more powerful than others, some are more complex to make, and some will require a lot of money.
We are going to talk you through one of the cheaper ways to make an aquarium chiller. In terms of complexity, this is one of the easier options too.
You don’t need much technical DIY skills. If you haven’t made anything like this before, read through the method carefully until you fully understand what you need to do.
After completing the final step, you will have an aquarium chiller designed for roughly 50-gallon tanks. It may work for larger tanks too; it depends on your needs and how cool you want your water to be.
Once you have all the components needed, you can get started.
- Clearing the Refrigerator
You need as much free space in your refrigerator as possible, so try to remove everything you can from the inside.
Yours will likely contain many shelves and gratings which can be taken out with ease. Bottle holders are common in the door too, removing these, if possible, will make more space.
Most mini-refrigerators have a small freezer section. Don’t remove this. Only detach the door to it, leaving the freezer tray, as this will help to circulate cold air through the system.
Do not touch the thermostat either.
- Adding Internal Piping
Lots of internal piping is needed to fill your refrigerator. The more piping is used, the longer the water will be flowing through the cold air and pipes, and the cooler it will become.
Rinse out your piping for a few minutes to remove any dust or particles within that might ruin the health of your aquarium.
Connect up all the piping that you are going to use inside the refrigerator. Once you have one long tube, cut off any connectors that might be on each end.
When placing the piping inside, make sure there aren’t any kinks that will restrict water flow. Coiling it up will help. Kinks are less likely in more rigid piping.
- Drilling Holes
Your aquarium water needs a way to enter and exit the refrigerator, so you need some holes that piping can be threaded through.
It doesn’t matter where these holes are added, as long as they don’t go through any important parts responsible for keeping the refrigerator functional.
Pick a spot that is most convenient for your aquarium setup; somewhere that will keep the length of tubing from your aquarium to the refrigerator at a minimum.
Use a spade drill to cut the holes. The spade should be slightly smaller than the diameter of the piping to ensure a tight fit, sealing the refrigerator.
- Installing the piping
The next step is to insert the piping through the two holes you have made.
Slide one end of the internal piping through one hole and the other end through the second hole.
Aquarium water will enter through one end, travel through the chiller tubing (cooling as it goes) and leave through the other end.
If the pipes feel a bit lose in the holes, you can silicone them in place. This will hold them firmly and help to seal the refrigerator, preventing cold air from escaping.
You could instead insulate the entry and exit holes using expanding foam around the piping. This is slightly more effective than silicone, but it is more expensive and not essential.
- Preparing the Chiller
Your DIY aquarium chiller is now virtually complete and ready to be connected to your aquarium setup. Before you do this though, set it running in preparation.
Adjust the thermostat to the lowest temperature and leave the chiller on for at least 24 hours.
After this, you can connect it to your aquarium.
- Connecting Your Aquarium
The final step is to connect the chiller to your aquarium. There isn’t a defined way to do this because everyone’s setup is different, you may think of your own method that best suits your needs.
One way to connect the two devices is to add a second pump into your aquarium, separate from your filter.
This would draw in water, send it to the chiller, and return it to the tank, in a similar way to how a filter sends water over filter media and returns it.
If you don’t want the pump in the tank itself, you could plumb the pump and piping outside the tank by creating another set of entry and exit holes on the aquarium.
Another option is to connect the chiller to a canister filter so that the water moves through the chiller as part of the route through your filtration system.
Perhaps the easiest method is to use a sump, which would let you use a cheap and small powerhead/pump.
A good idea is to add a valve at the connection between the piping from your aquarium and the chiller piping. This will let you control the flow of water, which will help you to control water temperature too.
Reduce the distance between the chiller and the aquarium as much as possible, so the ambient room temperature can’t have too much of an effect on the water in the tubing connections.
Once you have decided how you want your aquarium to connect and have completed it, everything should be ready to go. You can start up the pump and give it a try.
Using Your Aquarium Chiller
Once you have set your new system going for the first time, keep a close eye on it.
Watch out for any leaks at each of the connection points, these should become obvious pretty quickly. Turn the system off and use more silicone or expanding foam to fix the problem.
Another thing to monitor is the temperature of the water.
You have made a chiller because you want to keep your aquarium water cool, but a cheap DIY solution means you can’t set what temperature you want the water to stay at.
You must use trial and error. There are a couple of ways to influence the water temperature.
Firstly, you can gradually adjust the refrigerator thermostat. The second way is to control the flow of water; the longer the water is in the chiller, the cooler it will be when it comes out.
Controlling the flow of water is easy if you installed a valve when connecting your aquarium.
If the water is coming out too cold, you could shorten the length of tubing inside the refrigerator, to reduce the amount of time that the water is in the chiller.
If the water is too warm, you could insulate the piping between the aquarium and the chiller, to reduce the impact of the ambient room temperature. This will only help if the room is particularly hot.
Keep a thermometer inside your aquarium so you can regularly check that the temperature is at the level you want.
Summary
If you’re reading this article, you probably need a way to keep your aquarium cool, but you don’t want to spend lots on buying a brand-new aquarium chiller.
Hopefully, we have shown you that you don’t have to lose much money, as long as you’re prepared to put in some effort to make your own aquarium chiller.
It’s not as difficult as it sounds, and it doesn’t take too long if you know what you’re doing.
Even if you are able to afford a chiller, this can be a fun project to get stuck into, especially if you have some spare time and enjoy doing DIY.
It’s a rewarding experience that you will be proud of once you’re finished.
Have you tried making your own aquarium chiller? Let us know how you did it in the comments below…


Be the first to comment